Lawn Edging Techniques for a Neat and Defined Yard
Imagine hosting a neighborhood gathering where your yard instantly steals the spotlight. Clean, crisp lines frame your lawn like a perfectly maintained golf course. Guests pause, look around, and ask how you pulled it off. That is the power of smart lawn edging techniques. With a few simple strategies, you can turn an average yard into something truly eye-catching. Even better, edging makes mowing easier and helps keep weeds under control. In this guide, you will discover practical and creative ways to achieve a neat, defined yard that looks professionally landscaped. Ready to level up your lawn and turn heads? Let’s get started.
Why Edging Matters More Than You Think
Clean edges do far more than just look good. They instantly boost curb appeal by creating sharp, intentional boundaries throughout your yard. Instead of grass creeping into flower beds and creating a messy look, edging keeps everything in its proper place.
Another major benefit is time savings. Once your edges are defined, mowing becomes smoother and faster. You will not have to wrestle your mower around sidewalks or driveways anymore. One homeowner shared that after edging just once, his mowing time dropped significantly. Now he spends more time relaxing outdoors instead of maintaining it.
Edging also gives your property a polished and well-cared-for appearance. It sends a clear message that your yard is maintained with attention and care. Neighbors notice details like this, and your lawn will quickly stand out in the best way.
Essential Tools Breakdown
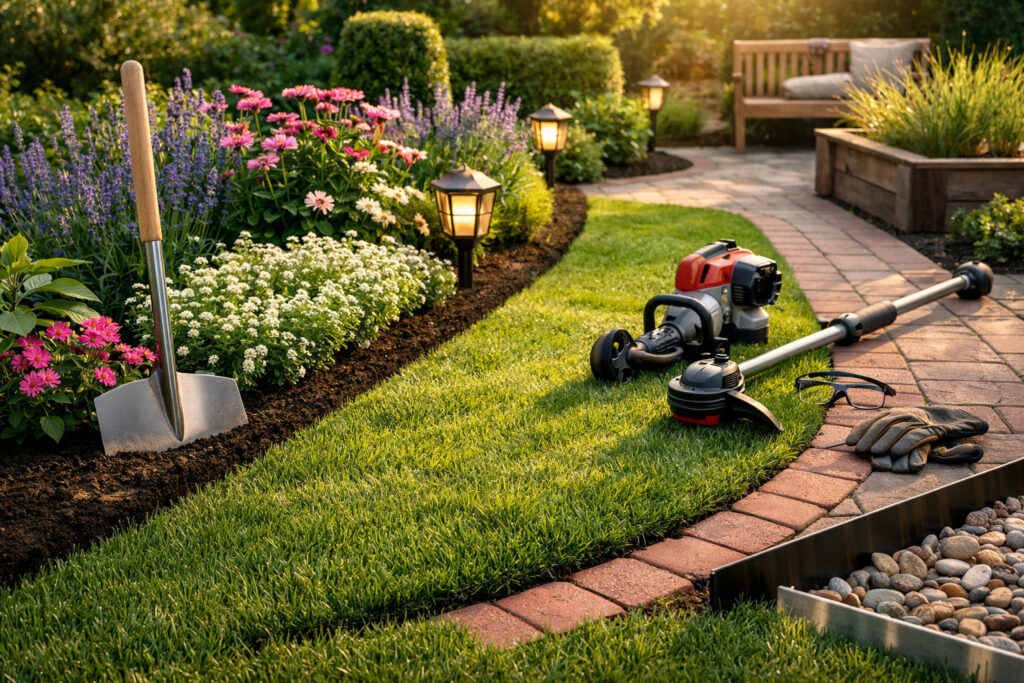
Having the right tools makes all the difference when it comes to edging. Each option offers unique advantages depending on your yard size, design, and experience level. Here is a helpful overview to guide your choice.
| Tool | Pros | Cons | Cost Range | Pro Tip |
| Half-Moon Edger | Precise cuts, full control | Requires physical effort | $20-50 | Slightly moisten soil for smoother cutting |
| String Trimmer | Fast and versatile | Lines may not be as sharp | $30-150 | Attach a metal blade for better edging |
| Spade Shovel | Affordable and effective | Slower for large areas | $15-40 | Keep the blade sharp for cleaner cuts |
| Power Edger (Gas) | Fast and highly precise | Noisy and requires fuel | $100-300 | Practice in a hidden area first |
| Metal Strips | Long-lasting and sleek | Takes time to install | $2-5 per foot | Bend gently for curves |
| Brick Pavers | Durable and decorative | Labor-intensive setup | $1-3 each | Use a sand base for stability |
| Lawn Shears | Great for detail work | Time-consuming for large areas | $10-25 | Oil blades regularly |
Start with one or two tools that suit your needs. As you get more comfortable, you can expand your toolkit. With the right equipment, edging becomes less of a chore and more of an enjoyable project. Before long, people will start asking for your tips.
Technique 1: Classic Spade Trench
If you appreciate a timeless approach, the spade trench method is a fantastic option. It creates a clean groove about three inches deep around garden beds and walkways. Begin by marking your desired line using string or even a light sprinkle of flour. Lightly water the soil to make digging easier.
Next, press the spade into the ground at a slight angle, around 45 degrees. Rock it gently to form the initial cut. Continue with short, controlled motions to deepen the trench. Remove loose soil and refine the edge using the corner of the spade.
For curved designs, a flexible garden hose works well as a guide. Try to avoid working with dry, compact soil since it can lead to uneven lines. With a bit of patience, this method transforms overgrown edges into clean, defined borders that look fantastic.
Technique 2: Power Edger Magic
For speed and precision, a power edger is hard to beat. These machines glide through grass effortlessly and deliver sharp, professional-looking lines. Start by mowing your lawn first so you can clearly see where to edge. Set the blade depth to about two inches.
Hold the edger steady and move at a consistent pace. Let the machine do the work instead of forcing it forward. You can create straight lines along sidewalks or experiment with decorative patterns for a more unique look.
Safety is important, so wear gloves and protective eyewear. It is also a good idea to practice in a less visible area before tackling the main sections. Gas-powered models are powerful but can be loud, while electric versions are quieter and easier to manage. Once finished, clear away clippings for a clean final look. The result is a lawn that looks sharp and professionally maintained.
Technique 3-5: Creative Borders That Wow
If you want something more permanent and visually striking, creative borders are the way to go.
Start with bricks or pavers. Dig a trench about four inches deep, add a layer of sand, and place the bricks snugly together. Compact them firmly and lightly water the area to help everything settle. For an extra touch, consider adding subtle lighting for a warm evening glow.
Metal edging strips are another excellent option. Secure them with stakes and shape them as needed. They are flexible, long-lasting, and ideal for both straight lines and curves. This option works especially well for modern landscaping styles.
For a more natural look, try a mulch trench. Define the edge with a spade, then fill the space with bark, gravel, or decorative stones. You can enhance the border by planting low-growing plants like lavender along the edge. For a creative twist, recycled glass bottles can be partially buried to add a unique visual element. These ideas bring personality and charm to your yard.
Maintenance Mastery
Keeping your edges looking sharp does not require much effort once everything is in place. A quick weekly touch-up helps maintain clean lines, while a more thorough check every couple of weeks prevents overgrowth.
Weather can affect your edges, especially during rainy seasons when soil shifts. After heavy rain, take a few minutes to redefine any areas that have softened. If grass starts to creep back in, trim it down promptly.
Clearing away soil buildup and lightly fertilizing the edges can also help maintain a strong, healthy boundary. With consistent care, your yard will stay neat and impressive all year long.
Bonus Hacks for Epic Results
Looking to add extra flair? These simple ideas can take your edging to the next level.
- Install solar lights along borders for a soft evening glow
- Use contrasting plants like white alyssum for visual impact
- Add bamboo stakes for a tropical touch
- Fill edges with gravel in low-water areas
- Use reclaimed wood for vertical edging in raised beds
These finishing touches bring character and creativity to your landscape. Your yard will not just look neat, it will feel thoughtfully designed and inviting.
Ready to transform your outdoor space? Grab your tools and start shaping those edges. Once you see the results, you will understand why edging makes such a big difference. Share your progress and favorite techniques. Which one are you excited to try first?
This post is generated by ChatGPT